Since the project requires a lot of setup and support files, the easiest way to create a project is to copy another project as a template. The project we are going to copy is the TimedRobot project. It would be nice if there were a nice VS Code wizard to create the project, but in lieu of that, I have created a small Java program called CreateRobotProjectVSCode which we can use to make a workable copy of the TimedRobot project and then we can load that new project into VS Code.
To run this program, open the Windows File Explorer, find the VSCode folder inside RobotTools2024 / VSCode , and then double click on the CreateRobotProjectVSCode.jar file. This should display the following dialog box.
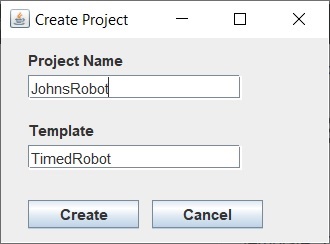
In the Project Name field, enter the name of your new project (e.g. JohnsRobot) and leave the Template field set to TimedRobot. Don’t put spaces or other punctuation in your project name; you’ll regret it later. Then click the Create button. If all goes well, it should create a project with the name you gave.
Once the project has been created, go back to Visual Studio and choose the File / Open Folder command:

And select the folder that you just created (e.g. JohnsRobot):

Click the Select Folder button and it should load your project:

Close the “Get Started” in the right pane and expand the src tree in the left pane to see a listing of the source files for your program. Click on Robot.java in this pane to display this source file in the right pane:
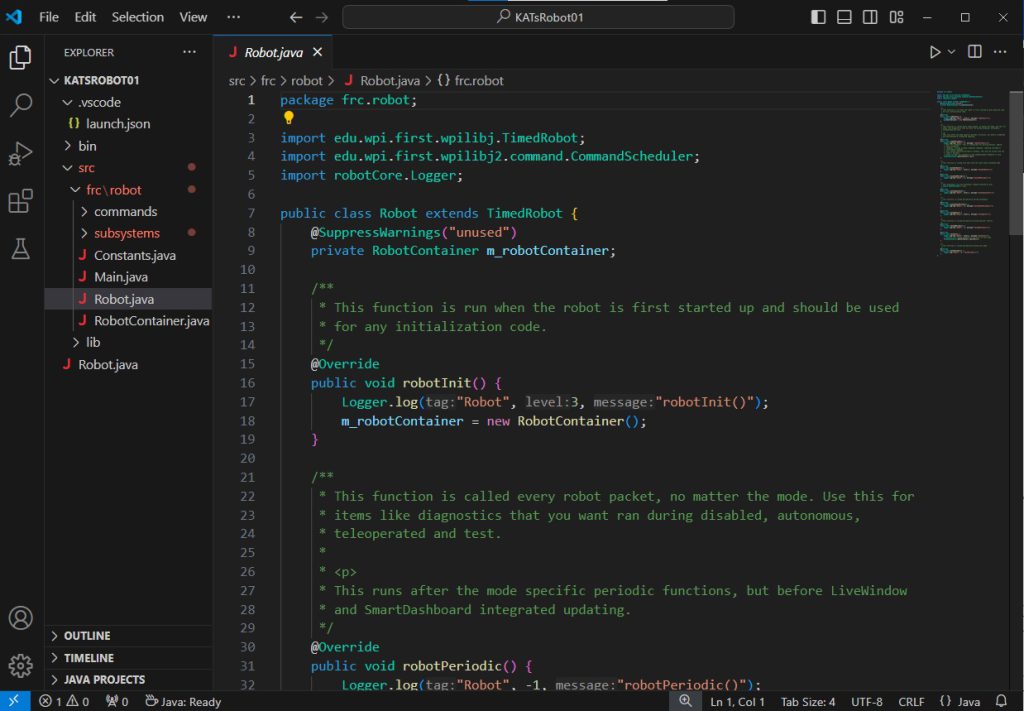
Your program consists of a Robot class which inherits from the built in TimedRobot class. Let’s take a look and try and understand the structure of this class:
|
1 2 3 |
public class Robot extends TimedRobot { @SuppressWarnings("unused") private RobotContainer m_robotContainer; |
The first thing we see is the declaration of, m_robotContainer. This will contain an instance of the RobotContainer class which will hold many of the resources that we will need for our program. Note that we are not initializing this variable here, instead we wait and do that when the robotInit function is called:
|
1 2 3 4 5 6 7 8 9 |
/** * This function is run when the robot is first started up and should be used * for any initialization code. */ @Override public void robotInit() { Logger.log("Robot", 3, "robotInit()"); m_robotContainer = new RobotContainer(); } |
As the comment suggests, this function will be called once the robot in initialized and is where we should do any initialization that is required. Here is where we create the instance of RobotContainer.
The next function we see is robotPeriodic:
|
1 2 3 4 5 6 7 8 9 10 11 12 13 14 15 16 17 18 19 20 |
/** * This function is called every robot packet, no matter the mode. Use this for * items like diagnostics that you want ran during disabled, autonomous, * teleoperated and test. * * This runs after the mode specific periodic functions, but before LiveWindow * and SmartDashboard integrated updating. */ @Override public void robotPeriodic() { Logger.log("Robot", -1, "robotPeriodic()"); // Runs the Scheduler. This is responsible for polling buttons, adding // newly-scheduled // commands, running already-scheduled commands, removing finished or // interrupted commands, // and running subsystem periodic() methods. This must be called from the // robot's periodic // block in order for anything in the Command-based framework to work. CommandScheduler.getInstance().run(); } |
As the comment explains, this function will be called periodically as long as your program is running. It is principally used to run the Command Scheduler, but would be the place to put any code that you needed to run regardless of the mode or whether the robot is enabled or disabled.
Next we see a set of eight functions which are used to control the four modes of the robot, Disabled, Autonomous, Teleop, and Test.
|
1 2 3 4 5 6 7 8 9 10 11 12 13 14 15 16 17 18 19 20 21 22 23 24 25 26 27 28 29 30 31 32 33 34 35 36 37 38 39 40 41 42 43 44 45 46 47 48 49 50 51 52 53 54 55 56 57 |
/** * This function is called once each time the robot enters Disabled mode. */ @Override public void disabledInit() { Logger.log("Robot", 2, "disabledInit()"); } @Override public void disabledPeriodic() { Logger.log("Robot", -1, "disbledPeriodic()"); } /** * This autonomous runs the autonomous command selected by your * {@link RobotContainer} class. */ @Override public void autonomousInit() { Logger.log("Robot", 2, "autonomousInit()"); } /** * This function is called periodically during autonomous. */ @Override public void autonomousPeriodic() { Logger.log("Robot", -1, "autonomousPeriodic()"); } @Override public void teleopInit() { Logger.log("Robot", 2, "teleopInit()"); } /** * This function is called periodically during operator control. */ @Override public void teleopPeriodic() { Logger.log("Robot", -1, "teleopPeriodic()"); } @Override public void testInit() { Logger.log("Robot", 2, "testInit()"); // Cancels all running commands at the start of test mode. CommandScheduler.getInstance().cancelAll(); } /** * This function is called periodically during test mode. */ @Override public void testPeriodic() { Logger.log("Robot", -1, "testPeriodic()"); } |
The comments in the code are pretty self explanatory. Each of the modes has a function (e.g. autonomousInit) which is called when that mode starts. Then, as long as the robot stays in that particular mode, that mode’s ‘periodic’ function (e.g. autonomousPeriodic) will be repeatedly called.
Before we move on, I would like to bring your attention the the numerous calls to Logger.log(…). This is a debugging function which allows you to add logging to your program. This can be most useful when trying to figure out why your program is not behaving the way you expect. The log function takes 3 parameters. The first is a tag which identifies this particular log and is usually the class name.
The second is a priority which determines when the log will be displayed. The higher the number, the more likely that this line will be displayed. You can change the logging level by calling setLogLevel.
The third parameter is whatever you wish to log. I strongly suggest that you make use of this feature when writing your code. It can make finding an elusive problem much easier later, especially when the problem only manifests itself when running the robot in competition.